IMPORTANT NOTE: If you set up a domain property in Google Search Console you will not yet have access to all of the features from the old Google Search Console. For example, the disavow file upload, crawl stats and more. You will still need to add additional profiles at a URLprofile level (i.e. you'll need to add http://yourdomain.com and https://yourdomain.com and https://www.yourdomain.com and http://www.yourdomain.com) to see these features which are specific for each. You can do this all very easily once you have set up the domain profile for the whole root of the domain. Simply set each up individually afterwards and they will automatically be verified once you press verify for each because you have set up the whole domain verification. It's simple really. Set up the domain profile and verify that using DNS (either at your domain name provider or via CDN's e.g. Cloudflare), and then set up each one of the individualURLprofiles for e.g. subdomains and different protocols. Then press verify now for each of them.
Let's get started
If you've been keeping an eye on the many changes coming and going between the old Google Search Console and the new Google Search Console you'll have noticed that one thing which was being removed was the ability to build 'property sets'.
Property sets allowed for various subdomains and protocols in a group to be clustered together for combined analysis. For example, you might want to include http, https, http://www, and https://www versions of a site and group them together in a nice tidy little package.
Google told us they had decided they were going to remove this feature because it wasn't really being used by enough users of Google Search Console (Google Webmaster Tools) and they couldn't justify its maintenance / existence. That said, there was a bit of a kerfuffle on Twitter as some of ardent fans of property sets expressed their disappointment.
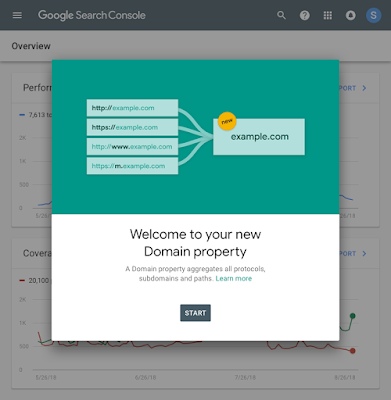
This morning Google announced via their webmaster blog that they were adding a new feature which to all intents and purposes acts as a suitable (if not better) replacement for property sets.
The ability to add an individual domain property, which would show all data for a complete root domain in one place.
At first glance this looked like a simple option which could be verified in the same way as past properties, but there are a couple of 'gotchas' along the way.
Firstly, you need to realise that this is a new property you're adding to your Google Search Console account, not an existing one you're modifying. That caught me off-guard for a while as I was simply waiting for something to appear. It doesn't. You need to add this as a whole new 'property'.
Secondly, the Google domain property can only be accessed in Google Search Console if the domain has been verified at a DNS level which means adding a TXT record to the DNS records at the domain registration level.
This is fairly straightforward, although of course, not as simple as the other methods of verifying a property which we've been used to before, and it's likely the majority of Google Search Console users have used one of the several other methods to verify properties in the past.
I've outlined some of the steps below although please bear in mind that different CDNs and domain name accounts will have different user interfaces, but this should give you a general direction. I've used Cloudflare for the CDN example.
Verifying your domain property
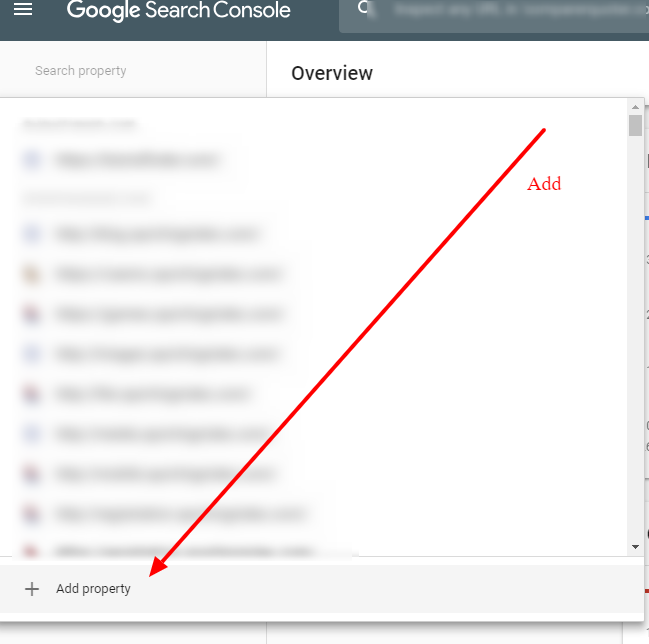
Go to the list of your domains on the left-hand side in the new google Search Console and at the bottom you will see 'Add new property'.
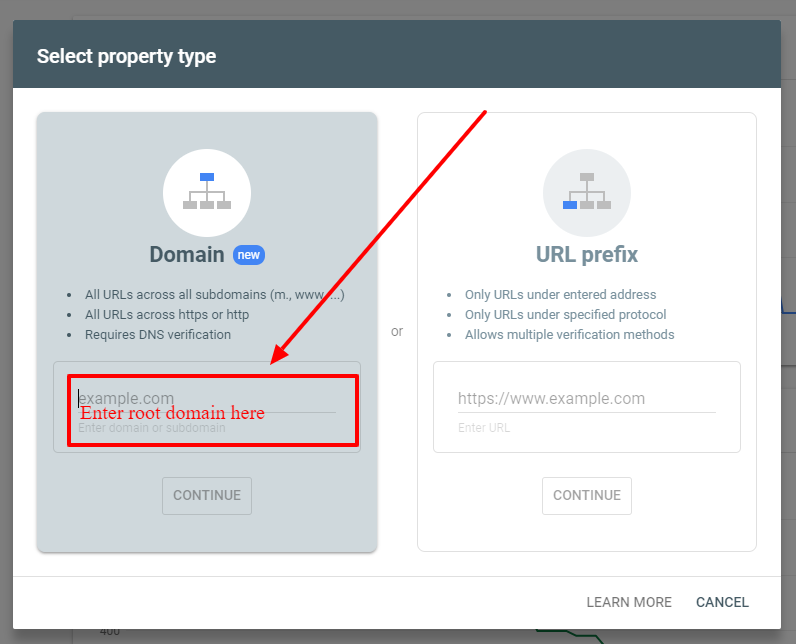
Once you've seleted '+ Add property' you'll be taken to a new screen. You'll need to enter the root domain name here that you want to verify / add in the left hand box. The right hand box appears to provide the same levels of individual setting as was available in the previous verification methods. i.e. https, https://www, etc.
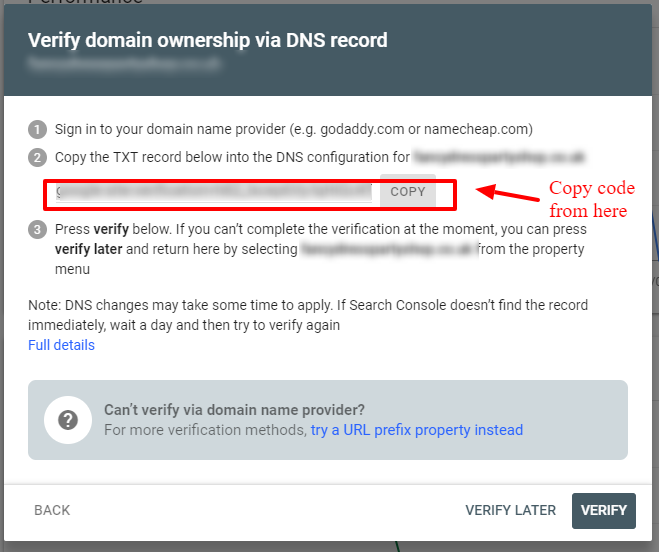
Once you've entered the root domain, in the next screen you'll be presented with a verification code which you need to copy and add as a TXT record at your domain name provider. You're verifying the domain ownership here via DNS record. The code is a simple copy and paste.
You'll need to then access the domain name registration account which the site is on and head over to 'domains'. There are many, many domain name providers and all of them will have different user interfaces of course.
Here is an example below from one of the projects I was verifying.
Once you're logged in to the domain name provideruser interface navigate over to the particular domain you're verifying.
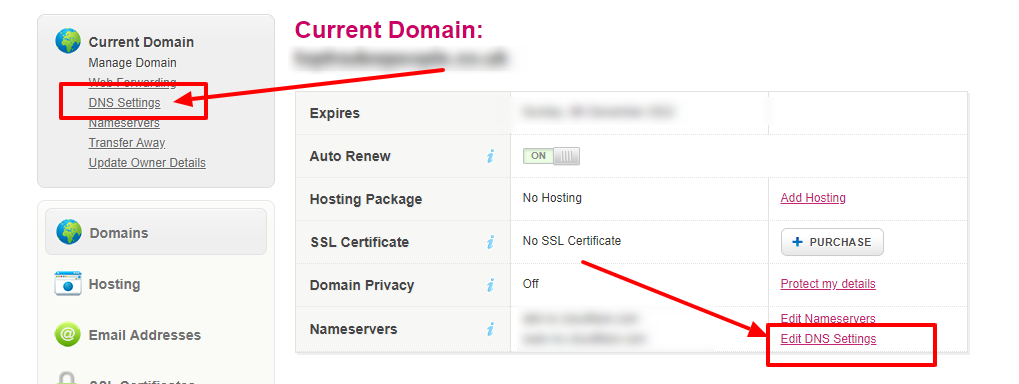
From there navigate to 'DNS Settings' or 'Manage DNS' or 'DNS'. Naturally, different domain name providers are going to have different names in their user interfaces. You're looking for something with 'DNS' in.
LCN Interface
You want to edit the DNS setting.
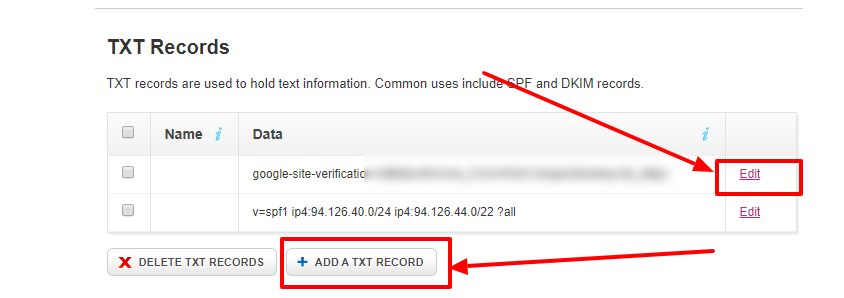
Once you're into Edit DNS Settings you'll need to add a TXT record. Here's one of the google-site-verification records already added.
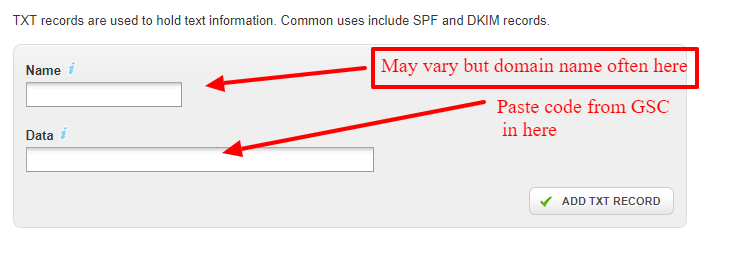
You'll enter the code you copied from Google Search Console into the new TXT record you create as below (again different domain name providers will have different user interfaces).
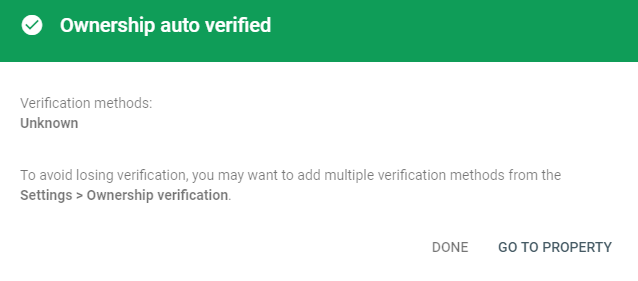
Add and save the TXT record and then head back to Google Search Console and hit the verify button. Bear in mind that things can take a little time to catch up so there may be a gap between you adding the TXT record and the verification being successful.
Hit the verify button and you should see the following screen.
If you're using a CDN such as Cloudflare the DNS management is likely handled over on their platform so changes you make to the main domain name provider won't impact anything on the actual domain itself.
If this is the case, and you've tried to add the TXT record on the domain name provider and the DNS is managed elsewhere (e.g. Cloudflare) you'll likely get a warning like the one below:
There's a bonus here though, in that if do you have access to a website's Cloudflare account you can add the TXT record over there directly in the Cloudflare account as below:
Verifying a domain property in Cloudflare
Log in to Cloudflare and head over to the sites you have access to.
Choose the site you're looking to configure the new TXT record for.
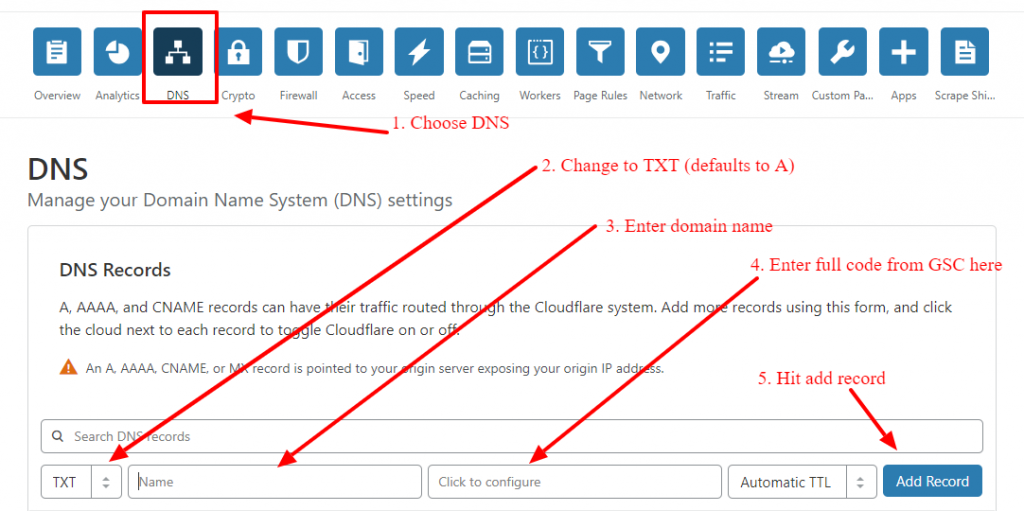
Once you're in the interface for the site you want to add the TXT record for choose DNS from the Cloudflare options in the top menu.
You should immediately see a list of A, MX and TXT records for the domain.
Add a new record but ensure you choose TXT rather than the default A record.
Enter the domain name into the first field.
Enter the code you copied and pasted from Google Search Console into the second field
Choose Automatic TTL in the next field.
Hit Add Record.
Head back over to Google Search Console and hit 'verify'.
Again, you may have to wait a little while (or even purge the Cloudflare cache), but verification should work if you follow these steps for Cloudflare.
Once you hit verify you should go back into Google Search Console you should now see the success screen as below.
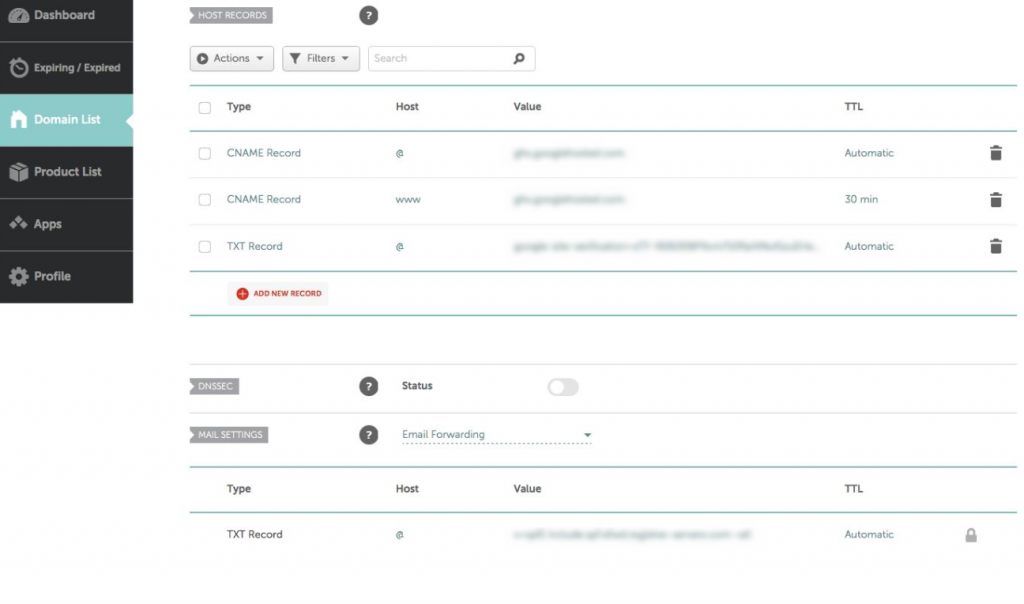
NameCheap Domains
Peter Nikolow also kindly provided an example of a NameCheapuser interface in case NameCheapusers find it helpful.
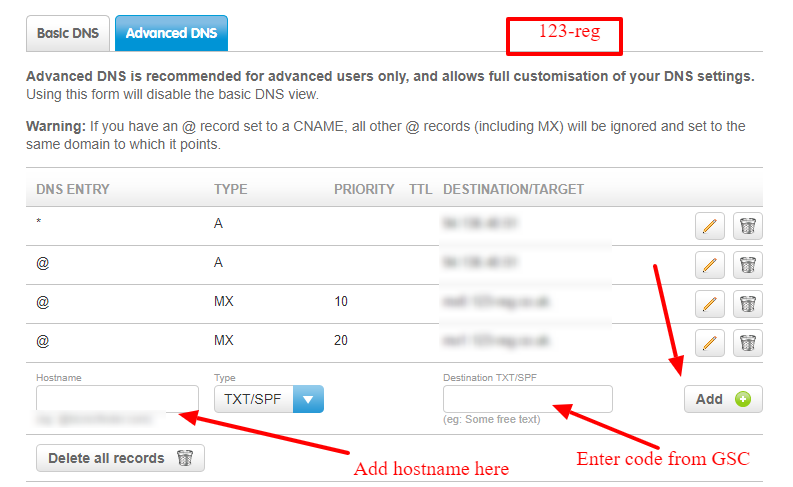
123-Reg
I also had access to a 123-regaccount too so this is the user-interface for that domain name provider type:


 and Conversational Actions - Current Situation")


